Posted on

3 Helpful Features of the Primary Triad in Painting

Before we Hit the Triad

In art, we can define the Primary Triad as a “color scheme”. There are many color schemes that an artist can use to create the impression they hope for. A color scheme is the artist’s starting selection of colors, usually based within 2-4 different hues. Many established schemes exist and are seen every day, in advertising, movies, and print. A scheme is essentially a formula to derive a set of colors from the traditional color wheel. It helps artists maintain a consistent focus of color with their designs.

Some popular color schemes are:

  • Monochromatic
  • Analogous
  • Complementary
  • Split-Complementary
  • Triad
  • Tetrad

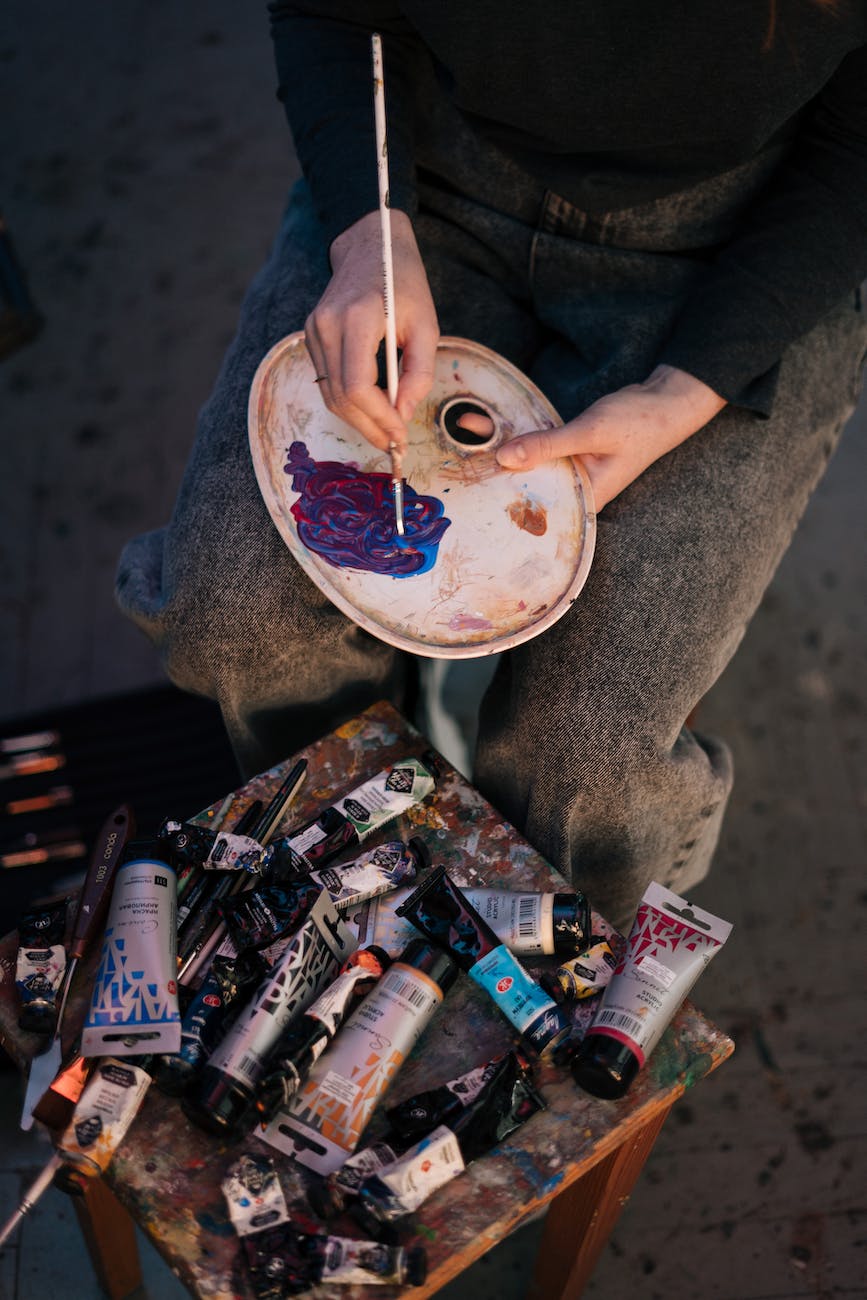
Today, we will focus entirely on a particular type of Triad scheme: the Primary Triad. And, while the Primary Triad can be found all throughout our media world in its most pure and unblended form, we’re going to discuss how it lends itself beautifully to a painter’s palette.

Primary Triad Basics

What is a Primary Triad?

The “Triad” finds its meaning in the number 3. All Triad schemes consist of 3 colors.

The “Primary” finds its meaning in the particular selection of colors – Primary colors. Namely, red, yellow, and blue.

Putting both words together, we can understand what we are dealing with. A Primary Triad is a color scheme based solely in the colors red, yellow, and blue.

The next time you’re looking through an advertisement for children’s toys, pay special attention to the color choices. You will often find that the Primary Triad is used commonly to appeal to kids. Not only is it a very basic and consistent set of colors that can be easily identified, but the colors also operate together to create a huge amount of visual interest.

Yellow and Red are often used to grab attention, with their strong and vibrant hues. Blue is a nice counterbalance to them and offers its own intense and pleasing color. Putting these colors together, you find a large amount of visual vibration, as they play off of each other in a balanced and visually stimulating way. In fact, the Bauhaus School often revered red, yellow, and blue as being central to art and our understanding of color.

But it’s not just these three colors alone that make them so suitable to painters…

Feature #1: They Mix Well Together

When you start with a Primary Triad, it makes it much easier to mix a wide variety of colors. You probably remember being in elementary school and learning that red and yellow make orange, red and blue make violet, and yellow and blue make green. This basic formula has helped artists for centuries.

Orange, violet, and green are known as “secondary colors” and what’s magical about them is that they feel completely different from the primaries. You can see the way that they link together, but they also set themselves apart as unique hues.

Let’s look at a twelve-color wheel for a second.

primary triad

You’ll notice that the primary colors and secondary colors also have colors between them with names that combine their neighbors, primary-first. So, the color between red and orange is known as red-orange. These are called tertiary colors. And if we were to create a 24-color wheel, we would see even more bridging hues. We can even break it down further if we want to.

What is remarkable about this is how fantastic our primary colors are at creating other vibrant colors and how many colors we can create when we mix them together in different ratios. This is worth exploring and I would recommend that you experiment with your primaries to see how many colors you can create!

Feature #2: But, wait! There are even more colors!

Ever wonder how you mix a brown? I remember as a kid, I asked my mom how to make brown with the crayons I had. She said to mix red and green. She was right!

However, that’s not the only way you can make brown. There are dozens of ways to do it. There are even many ways to shift the brown exactly to where you want it to go, whether it’s more of a red-brown or a green-brown. It all has to do with complementary colors.

First, let’s define what we’re talking about. We already talked about those vibrant primaries, secondaries, and tertiaries. When they are at their fullest, they are often referred to as “pure” hues. Now, we’re looking at neutral hues. These are the muddy colors, like brown or gray.

A neutral hue is created what you combine complementary colors. Complementary colors are on opposite sides of the color wheel from each other. For instance, orange and blue. Yellow and violet, too. Pick any color and trace a line directly to the opposite side of the wheel – there you will find the complement.

Now, I want you to notice something awesome. I mentioned combining orange and blue a moment ago. Well, blue is a primary color and orange is a secondary, made up of red and yellow. So, in essence, we are combining our primaries to create those neutral colors. This is incredibly insightful for artists who may have mixed a neutral color and it just isn’t coming out right.

Let’s say you mix you are painting a yellow flower. As you move into some of the shadowed areas of the petals, you see that you need to mix a neutral color. You rightly think to use violet in combination with yellow. However, as you mix them together, the neutral is coming out too green. Why is that happening?

It’s because your violet is actually bluer than it should be. Remember, when yellow and blue are mixed, you get green. If you want to tone down that green, you will have to add some red. Which makes sense, because red is the complement of green and will reduce the greenness of your mixture!

With the Primary Triad, you can create so many colors! Also, remember that you can add white to lighten any of these colors and black to darken any of them. That gives you a whole cornucopia of colors to work with.

Feature #3: Color Harmony

Do you ever go to your box of paints, not knowing which ones to choose? Maybe you’ve grabbed upwards of ten different tubes in the interest of getting a good variety of colors on your canvas. However, once it comes time to paint, you look at your palette and find yourself overwhelmed by the options. Eventually you just start choosing colors and hoping they will work. An artist who chooses colors randomly will always struggle to achieve color harmony.

Instead, let’s simplify. Using a Primary Triad will teach us how to economize and understand color relativity much better. It is vitally important to understand that colors act in relation to each other. They are often understood by the artist and viewer within their own framework. As an example, look at the painters of the renaissance. They had a very limited selection of colors to work with, mostly earthy in hue. Yet, they created masterworks of art, many of which read far more colorfully than we might expect.

This means that we, as painters, can also simplify our colors. In doing this, we will prevent ourselves from being overwhelmed with choices and we will also increase our understanding of color, as we utilize a limited palette of pigments. We will see firsthand how colors will work together to communicate exactly what you hope they will, even if you weren’t expecting them to.

A Primary Triad is a wonderful starting point for painters interested in imbuing their work with harmony. When you have fewer colors to choose from, you have far less chance that your colors will clash. Yes, a blue in real life may not be exactly the blue paint you have in front of you, but maybe you can mix one with what you have. Not only that, but it may not actually matter as much as color harmony does.

I think the most remarkable thing about using the Primary Triad as your starting palette is that it achieves that color harmony while still granting you so many color options. It’s like playing in a sandbox where every toy makes sense and works together to make the whole experience fun.

Next Steps

blue red and yellow stripe surface primary colors
Photo by Magda Ehlers on Pexels.com

Now that you understand the simplicity and flexibility of the Primary Triad, I hope that you will use it yourself. A recommended set of colors that will get vibrant results are Pyrrole Red, Lemon Yellow, and Ultramarine Blue. However, you can experiment with different pigments in place of your primaries.

Try:

  • Burnt Sienna, Yellow Ochre, Payne’s Gray (very earthy and natural colors)
  • Quinacridone Red, Indian Yellow, Phthalo Blue (probably going to get some interesting greens here)
  • Alizarin Crimson, Cadmium Yellow, Cobalt Blue (pretty vibrant, with a good chance for nice violets)

These are just off the top of my head. Experiment with your own combinations. Also, remember that replacing one of the primaries with a neutral will still have a nice harmonious effect and may even spark some creativity.

Have fun trying it out!

Check out this great color wheel resource, here!

I also wrote up a little article about Three Strong Strategies for Mixing Colors.

Posted on 2 Comments

3 Strong Strategies for Mixing Colors

a painter mixing paint on palette using a paintbrush

Keeping it Simple and Easy

Mixing colors is something that every artist has to do at some point. As an oil painter, I find it to be one of the most important elements that has to be done right to get good results with my artwork. There was a time when I was oblivious to it, then a time when I realized the significance and challenge of it. Now, I mix my colors with much more confidence, and you can, too.

I have 3 easy and strong strategies that will help you get the best results from your color mixing, whether you mix your paint before or during your painting practice. These are the most basic and effective strategies for mixing colors, so don’t be surprised if you think it sounds too simple.

You will not have to learn complicated color theory concepts. While those can be incredibly helpful in the long run, I want to help you get the most bang for your buck in the shortest amount of time. You can implement these strategies with any form of art that uses color pigment, whether it is acrylic, oil, watercolor, gouache, or any other medium that will allow for the tiny pigment particles to mingle and party together.

A quick note regarding these strategies: they can work simultaneously. However, I have divided them out into a process that prioritizes the most important elements of color. With enough practice, it won’t be long until you’re using these strategies in unison when mixing colors.

We will start by establishing the 3 central concepts that make up color. It is important to give these some good attention, because understanding them will be integral to mixing colors with confidence. Each section has tips that will expound on the simple concepts with illustrations to help guide your learning. At the end of this article, I give you a basic application of these 3 central concepts.

Let’s dive in!

Know the Value of Value

close up of a blue paint mixed on a wooden palette
Photo by ROMAN ODINTSOV on Pexels.com

In art, “value” is the word that describes the lightness or darkness of a color. If I were painting a still life, the shadows would be considered darker values than the highlights, which would be lighter values. Everything we see around us can be defined by their values and there are a wide range of values that our eyes can differentiate between and identify.

Values help us recognize forms and differences between objects through “value contrast”. When one value sits next to another value, the differences are often very clear, especially if the values are widely different. Our eyes are incredibly attuned to recognizing values and the forms that they imply, as it is the main task of our rods and a secondary task of our cones to perceive those shifts in value.

Simply put, light shines into our environment, our eyes see the variations in illumination, and our brains recognize the objects around us, mostly so that we can navigate and understand our surroundings.

When we paint, it is vitally important that we first recognize the values of the subject we are painting. Many oil painters start with the darkest values and work towards the lightest over time. This technique can be very helpful for keeping our values straight and understood correctly. If we are true to the value relationships of our subject, it will become very clear what we are trying to represent. Remember, it’s those values that communicate the forms of the objects we are painting and we are trained to recognize objects through those forms. Therefore, realism relies upon those values.

Think about black and white photography. Even without any hue or color intensity, we can still understand what we are seeing. That is all thanks to value and the forms that are described by the shifts and contrasts between values.

To apply this to your painting process, you will want to practice seeing and recognizing how light or dark the color you are trying to replicate or create should be. If you are a representational painter, pay close attention to those values first, then move your mind towards the next two strategies as you are mixing colors. If you are an abstract painter and mixing colors, think about the contrasts that you will create through value.

Identify the Hue

smudges of paint on a black surface
Photo by Susan Wilkinson on Pexels.com

Once the value of a color is observed, we can jump into recognizing the “hue”. Hue is just a fancy word for the basic color we are seeing. So, yellow is instantly recognized as a “yellow hue”, different from red, orange, blue, green, etc., based solely on its position in the color wheel and its essential family of hues. This is best expressed visually. Let’s look at the color wheel below.

mixing colors

Notice how it is divided up, with each section labeled. Those labels are the “hues”. They are defined as the family of colors that sit within a section of the color wheel or color spectrum. These labels are usually what we think of when we consider and talk about colors. I might say, “This is red and that is yellow.” You would understand what I mean without many, if any, questions.

When you are mixing colors, you will need to identify the hue that is most recognizable. A color that has no neutrality (“grayness”, “brownness”, or “muddiness”) is known to be a “pure” hue. When a color is very pure, the hue is far easier to identify. You still need to be careful and consider if the hue is between two hues or leaning in a certain direction. For instance, a red that you observe might lean towards red-orange or might lean towards red-violet. Knowing what the hue is doing will help you recognize the color of paint you should start with or what colors you should try mixing together.

Establishing a knowledge of the color wheel is indispensable. Break it down into sections. There are 3 “primary” hues: red (R), yellow (Y), and blue (B). These create the “secondary” hues: orange (R+Y), green (Y+B), and violet (R+B). “Tertiary” hues are those that reside between primaries and secondaries on the color wheel. These are yellow-orange, red-orange, red-violet, blue-violet, blue-green, and yellow-green. The 12 hues make up the basic color wheel that artists and designers often use to plan their color schemes and understand the working relationships between hues.

Once you understand hues, you will have a better time choosing what paint to use when mixing colors. For instance, if you want to mix a red-violet using a red paint and a blue paint, you will be better off starting with a more violet red (such as Quinacridone Red or Alizarin Crimson) and a more violet blue (such as Ultramarine Blue). If you were to mix an orangey red with a greenish blue your results would not gain you a vibrantly pure red-violet, but something more brown.

The above graphic shows popular and common pigments placed where they would belong on the traditional color wheel. This can help inform your decisions when selecting paints for mixing colors. Know that when you are mixing colors from pure pigments, you can guess what the results may look like by drawing a straight line between them on this graphic. The middle point on the line will be the average of the resulting mixture.

Knowing your hues makes it a lot easier for mixing colors. It also helps you communicate about color and even spot differences between similar colors, especially those that are “gray” or “brown”. A gray can be “reddish” or “blueish” or “greenish”, etc. Same with a brown or other neutral color. This will bring us into the next section.

Mixing Colors with Intensity

Vibrant red and yellow tulips

Colors cannot be defined only by value and hue. There is an element that speaks to the vibrancy, intensity, or chroma of a color. Intensity relates to that “pure” notion I discussed earlier. A color that is high in intensity will be very vibrant and close to its pure hue. We see that in the flowers shown above, as they radiate pure hues of red, red-orange, and yellow.

Many colors we see do not fall within easily-defined hues. They are lower in intensity and, therefore, harder to associate to a pure hue that they are derived from. These kinds of colors can be known as neutral or muted colors. What do we do with those?

When confronted with a neutral color, it is important to identify what hue the color is closest to. Then we can create a plan for mixing colors. For example, if a neutral color is reddish (often described as “warm”), we want to start there, then introduce paint colors that will bring our mixture closer to the observed color.

Composition in bright colors with gray
Muted neutral colors

There are many ways to neutralize a hue, but different approaches get different results.

If you want the neutral color to retain some of its intensity (not becoming too faded, but remaining strong in color), you need to introduce its “complement”. The complement of a hue is the hue on the opposite side of the color wheel.

As an example, red would be neutralized by green. Introducing just a little green will result in a reddish-brown. The green can either be one distinctly green pigment or the combination of pigments, such as yellows and blues. The less green we introduce, the more red our brown will be, and the more we introduce, the more green it will be. We can also try to introduce more blue or yellow, depending on if we need to pull or push the color in a different direction.

Mixing colors can feel very confusing at first! I know a lot of students that I have taught who really struggled initially to understand how to achieve certain colors with their paint. It really just takes some practice.

Faded or muted neutrals can also be mixed by introducing white, black, or gray. White lightens your hue, known as “tinting”. Black darkens the hue, known as “shading”. Gray desaturates your hue, known as “toning”. All three will lower the intensity of your colors, making them less vibrant. One of the most common painting errors is to introduce white as a brightener. However, while white does lighten, it doesn’t brighten (in the sense of increasing vibrancy).

Applying These Strategies

Paint on wall

Now we understand the three basic characteristics of color: value, hue, and intensity. Every color is going to have some element of each characteristic.

How do we use this knowledge for mixing colors? I have a little rundown of how you might approach mixing colors to match your reference.

First, note the value. Is the color dark? Is it light? Somewhere in between?

Then, note the hue. Can you recognize any? Where does it lean? Compare it to surrounding hues.

Lastly, note the intensity. Would adding white, black, or gray result in the color? Or do you need to keep things more vibrant by mixing together complementary colors?

Soon, you will be making these judgments without even thinking too much. Your color recognition and knowledge of your pigments will increase, you will grow in confidence, and your instincts will gain a more solid and sophisticated foundation. Mixing colors will become completely natural.

Finally, I would recommend that you start painting with a limited palette, if only to understand how colors can interact. A limited palette is a simple selection of colors, usually a red, yellow, and a blue, along with white. Try different combinations (Pyrrole Red, Lemon Yellow, Ultramarine Blue; then Alizarin Crimson, Yellow Ochre, Phthalo Blue, etc.). Try switching out a pure primary with a neutral color (for instance, use red, yellow, and Payne’s gray instead of blue). You will start to learn, firsthand, how these colors interact and the color wheel will become alive in your mind.

Read more great color advice with James Gurney’s book “Color and Light”, found here.

If you’re interested in oil painting, read my invitation and encouragement to you here.