Posted on

Fixatives for Charcoal, Pencil, and Chalk; Is it Worth It?

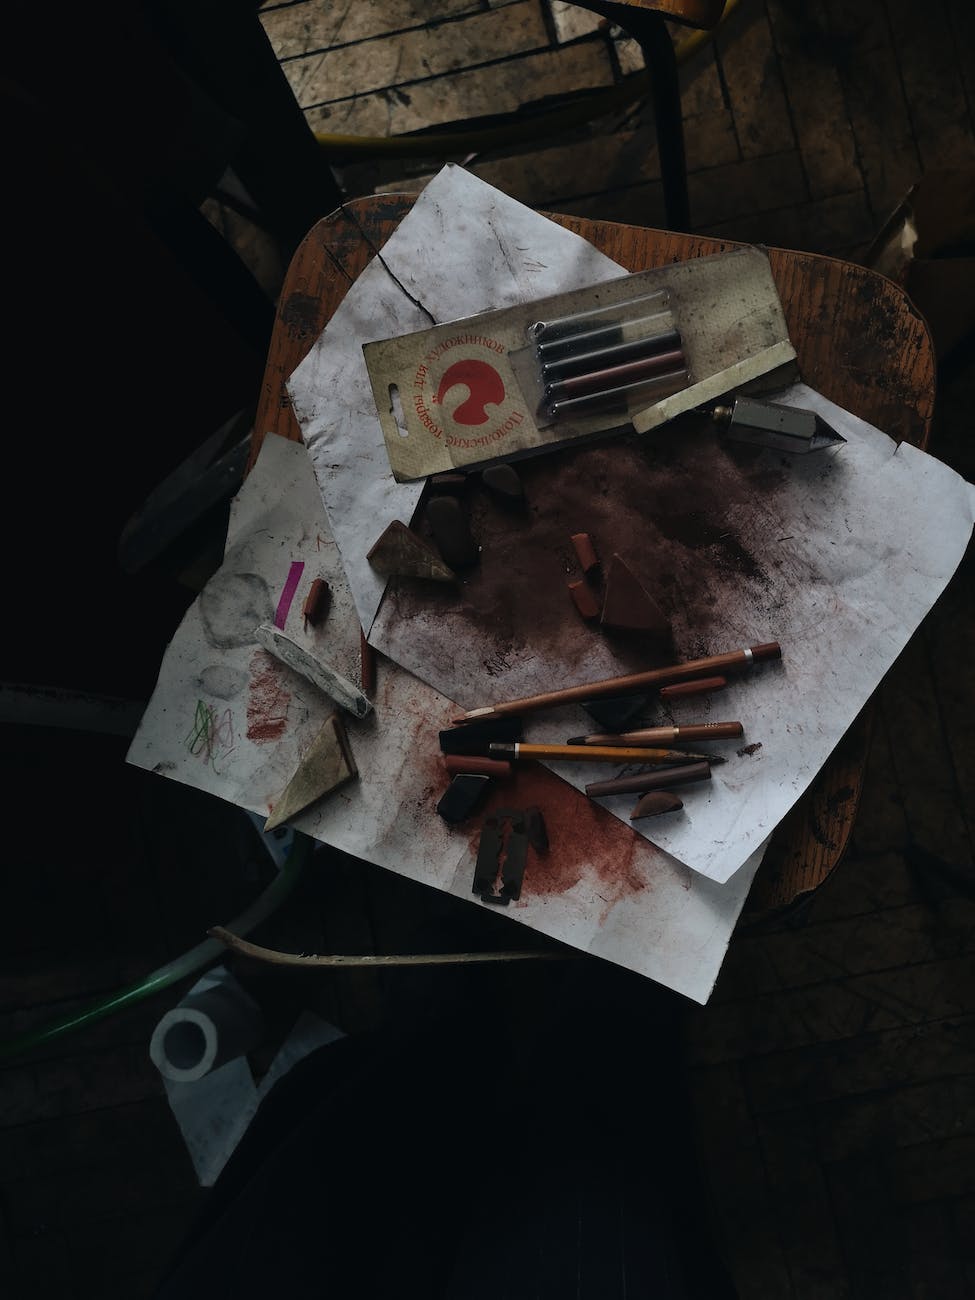
messy art supplies and papers

A fixative is designed to enable artists to lose the least amount of their work, especially when it is important to conserve as much as possible. Let’s explore more how fixatives for charcoal, pencil, and chalk can help or hurt our art.

Why Would You Use Fixatives for Charcoal, Pencil, and Chalk

Our art is precious to us. It represents our thoughts, emotions, and interests, directly from our hand. Drawings are a great way to create and express ourselves. They also allow us to study objects, develop beautiful scenes, and make wall art that suit us, our friends, or our customers.

The last thing we want is for our art to be compromised in its quality and ruined by smudging, flaking, or smearing. Chalk and charcoal in particular are very prone to being disrupted, with particles falling at the smallest bump or movement. Even blowing on powdery charcoal can make it fly everywhere.

What is a Fixative, Exactly?

A fixative comes in a spray can that projects a type of varnish which affixes particles together, sort of like a very thin and invisible glue. Fixatives are meant to be as unnoticed as possible, designed for easy use and no hassles. They are not meant to add to artwork, but to be applied as an invisible aid to the artist.

There are two types of fixatives. One is a workable fixative, the other is a final fixative. They each have their own place, but some artists might want to rely only on one.

Workable Fixative

A workable fixative is meant to be used throughout an artist’s process. The fixative itself is applied between layers of drawing. This helps the artist make changes throughout their practice, without disturbing or disrupting the charcoal, pencil, or chalk. The fixative itself can help accept the medium, acting as a sort of invisible ground that holds the particles to itself.

Final Fixative (non-workable)

A final fixative is meant to hold a drawing together at the end, without further work being done on top of it. Some artists just use a workable fixative throughout and ignore a final fixative, as it might feel redundant. A final fixative, however, can bring an overall harmonious quality to the end product, whether the artist wants a satin or matte finish to interact with light in a consistent way.

Which Do You Choose?

This comes down to the preference of the artist and their working methods. By reading how fixatives work you might get a sense of how you could use them. Just be sure to understand that a final fixative will not work well as an in-between layer of protection. It is meant to be final.

Cons of Using Fixatives for Charcoal, Pencil, and Chalk

The most common frustration for artists when it comes to using fixatives for charcoal, pencil, and chalk is a change in coloring of the paper. When you spray the paper with the fixative, it does alter the way the paper looks, even if only slightly. That might be enough to bother some artists.

However, some of this may be due to faulty use. While there will probably be some change in the color that is unavoidable, there are good practices to prevent it from being overwhelming. Make sure to have the artwork at a vertical angle, not on its back. Otherwise, puddling and oversaturation can happen, making the color-changing worse.

Another thing that may affect coloring is holding the can too close when spraying the surface. This results in a heavy spray, without much finesse and control. Make sure to hold the can far enough away to prevent this from happening. Starting with a small amount helps. Testing on scrap paper also gives you more clarity as to the effect the spray will have on the paper.

Alternatives to Fixatives

Even with practice and a good understanding of fixatives, some artists will not like using them. There are some other solutions that can make for successful drawings and displays.

Paper Choice

First, starting with a paper that has a lot of “tooth” can help from the get-go. This won’t prevent all issues, but it can make things easier from the start. Choosing a paper with texture will help the particles of charcoal, graphite, or chalk remain embedded in the fibers of the surface. This helps the drawing stay together when the paper is moved or jossled, but won’t always help with smearing or smudging.

Framing Behind Glass

While putting the artwork behind glass isn’t a perfect fix in its own right, thinking about the distance you can put between the glass and artwork with matboard helps display the art without problems. Choose a thick matboard to frame around the art and make sure to clean the glass before framing, on both sides. Cleaning the glass with cleaner reduces static, which might interact with the drawing.

Hairspray, a No-No

Do not use hairspray to affix a drawing. In the past, this was something artists did if they didn’t have fixative handy. However, it is harmful to the paper and not acid-free. Avoid it.

In Summary

Fixatives for charcoal, pencil, and chalk are a mixed bag. However, with the proper methods you may end up happier using them than foregoing them. This is especially true if you find yourself frustrated by your drawings smudging or smearing or losing delicate powdery parts.

Ultimately, you are going to have to decide what is most important to you. As technology improves, I’m sure there will be better options eventually, but for now we have to decide based on our own preferences.

Charcoal Supplies at Dick Blick

Pencil Supplies at Dick Blick

Chalk Supplies at Dick Blick

Fixative Supplies at Dick Blick

Interested in Learning a Painting Medium? Read This First

Need More Help?

I am always open to taking on private lesson students. I offer one free half-hour to get an idea of what your goals are and how we can get you to them. Then I design a specific lesson plan for you and we go from there. You can hire me for your personal lessons here at SuperProf or here at LessonFace.
Posted on 2 Comments

Painting for Beginners, Best Mediums

selective focus photography of paintbrush near paint pallet

What are the Different Painting Mediums?

In our modern world, surrounded by constant distractions, bad news, angry opinions, and an overwhelming sense of general anxiety, one of the greatest and most rewarding hobbies is painting. There are dozens of incredible benefits to painting, including a reduction of stress, increase in brain activity, and the joy of satisfaction. Painting tickles the brain in all of the best ways. But when dealing with painting for beginners, what is the best medium?

There are three big choices in front of you when you decide you want to start painting.

  • Oil
  • Acrylic
  • Watercolor

Besides these, there are others that branch off into different, more specific directions. Among them is gouache, tempera, casein, and pastels. There are also practices with these different mediums that can range from spray-paint or airbrush to mixed media projects. This article will not be delving into those subjects. Just know that if the three mediums we discuss don’t exactly pique your interest, there are other options.

Any links below are not affiliate, as I do not have any partnerships currently.

What To Consider

We’re considering three things when looking at these mediums and what we think is the best painting medium for beginners.

  • Ease of Use
  • Resulting Artwork
  • Costs and Materials

These three aspects help you make an informed decision when it comes time to visit the local art store or make your online purchase. Keep in mind that there are many art-related YouTube channels (including my own) that can help you get a better idea of what the medium will be like to work with.

The Mediums

Oil Painting for Beginners

Oil paint is my personal favorite. That may be because I made a concerted effort to learn it and make it my main medium of choice. I feel very comfortable with it right now and I do love the way it looks when it is finished. Let’s go over it more closely.

oil painting by john singer sargent

Elsie Palmer, John Singer Sargent, 1890, oil on canvas

Ease of Use

Oil paint might be considered by some to be the trickiest of the three options here. That can often come down to preferences in drying times. While oil paint doesn’t technically dry, but “sets”, it is still important to consider how long it can take to work with one painting. Many of the paints you will purchase from the art store will take a few to several days to set completely and experts even recommend waiting an entire six months before varnishing an oil painting, due to the duration you need for oil to set properly.

However, with slower drying times comes more flexibility. If you make a mistake with oil or want to change some aspect of your painting, it is easier to accomplish when the paint is still wet. This is much easier with oil than acrylic or watercolor which are less forgiving in this way. You can almost think like oil paint as “charcoal” compared to acrylic’s “pencil” or watercolor’s “ink”. It will give you greater freedom to move it around and make the changes or fixes you need to.

There are many ways to alter the use of oil medium by introducing additional oils or solvents. You can make the paint thicker or more prone to drying fast. You can make it easier to spread thinly or simpler to manipulate in flat strokes. The paint can have a semi-opaque quality depending on the pigments of some colors, which can help you layer “glazes”, bringing rich color in a way similar to watercolor painting. It is worth noting that water is not used as a lubricant or solvent, as it will not mix well with the oil. You should only use it when cleaning the brush at the end of your process.

A Couple of Brief, But Important Notes

All of these techniques take time and practice to acquire. While it is silly to say that oil paint is simple to work with in its most advanced forms, you can work straight from the tube with some stiff or semi-stiff brushes and achieve wonderful results. You can also use a palette knife to paint and get great textures. Oil paint is simple to use, at its heart, with plenty of room to move further into complexity and difficulty.

The last important thing to mention is how easily oil paint blends. This is a double-edged sword. Many beginning oil painters have difficulty because they use too much oil paint all at once, ending up with muddy colors. It is better to start with less paint and then work towards using more over time. This will also help you stick to the general “fat over lean” oil painting technique. This is important to reduce cracking of the paint layers. It dictates that you start with thin layers of paint then increase the amount of oil in your paint as you add layers to the canvas.

Resulting Artwork

Oil paintings are often regarded as being the most well-received and admired works in the art world. While many of the most renowned artists and movements utilized oil as a medium and many of the most expensive art sold was made with oil paint, it might be overstating the importance of the medium to put it above the crowd for these reasons.

Oil paint can maintain its vibrance and have great color depth when handled properly. The resulting paintings have a wide amount of variety depending on the artist’s methods. However, it is usually a bit easier to recognize an oil painting based on the way the paint sits in its layers. There can be a bit of blending, both through mixture and through the effects of transparent pigments layered over opaque pigments. There is often a sense of smoothly textured strokes of paint that still maintain a certain amount of mass.

The techniques of oil painters often differ from those of watercolor and acrylic painters. There is a stylistic quality to oil paint that you may often recognize (although this is not always that easy to see).

Since oil paint is easily blended, it can be hard for beginning artists to get the results they want. Sometimes paintings end up muddy-looking or blander than hoped for. Just being patient and working slowly is a great way to start. You can always increase your efficiency and speed over time.

Costs and Materials

Oil painting can be an expensive hobby. Many of the costs come down to the main materials you will be using – paint, brushes, and surfaces. The paint itself is more expensive than acrylics, but comparable to watercolor (though this can vary significantly from brand to brand). Brushes can be hard to maintain for beginners, so they can be an added expense (and good brushes aren’t exactly cheap). To prolong the life of your brushes, just try to clean them regularly. You can also rest them in walnut oil, which will make the paint easier to remove and keep your brushes nice and silky.

Most oil painters will use either canvas or wood panel as their ground, or working surface. This usually comes at a higher cost than a pad of watercolor paper, though – again – products vary by quality. You can easily get a pad of canvas paper. This won’t be that useful for hanging your art, but it is great for practicing your craft.

Then there are intangibles, such as a palette knife, paper towels, oil medium, solvent, and an easel, among other things. These have varying degrees of importance and you can use or introduce them as you need to or want to.

Synopsis

Painting for Beginners: Oil paint is the best for those who want to work with blending, layers, and slow-drying paint.

Picking the Right Paint Brushes for Oil Paint

Cleaning Your Paint Brushes

Acrylic Painting for Beginners

Most people start painting with acrylic paint. Not only is it easy to get a hold of, but it is also generally easy to work with. It is used in classrooms and elementary schools, as well as learning studios. It is usually pretty simple to set up and clean up. Let’s dive in a bit.

acrylic painting by david hockney

A Bigger Splash, David Hockney, 1967, Acrylic on canvas

Ease of Use

Beginners will find acrylic paint very easy to try out and get the hang of. Acrylic paint is essentially large color pigments bound by a polymer. Through mixing and layering paint, artists will be able to create works very quickly, without much fear of accidentally blending their layers. The paint dries very quickly, which means that it loses some of its flexibility, but gains a straightforward application method.

Many beginners will see this medium as a good jumping on point because it is so easily related to other artistic implements that we are used to from a young age. The immediacy of colored pencils, markers, and crayons is easily reflected in acrylic paint. The main downside to this is the fact that you might have to work quickly, as the paint will dry on your palette. There are mediums that you can introduce to your mix which will help to keep the paint wet longer.

Acrylic paint is generally easy to spread on your surface, having a creamy quality. It can dry to the brush pretty easily and quickly, so it is best to have some water and cloth or paper towels nearby to keep your brush clean. Little bits of dried or tacky paint can ball up and get into your fresh paint, otherwise.

Resulting Artwork

Many artists like the way acrylic paint looks when it has dried, but some do find it too dull or too glossy. This will depend on the quality of paint you are using. The lower priced paint can dry at different shades than you are seeing when you paint, which can be frustrating. It can also have coverage issues, where it does not spread nice and opaque. Mixing a little bit of titanium white or some other opaquer paint might help.

Acrylic paint is great for working on various surfaces and is often used in mixed media. It doesn’t have the same corrosive qualities of oil paint, so there is no fear of damage over time. It also doesn’t absorb into surfaces the way watercolor can, so it is a more exact medium. This can free you up to create a wide variety of unique works and end up with a myriad of results.

To get the best results from your acrylic painting, you might consider varnishing. This brings out the colors and values much more and usually results in a more vibrant painting. It also protects the painting from dust and damage. Before applying a varnish, it is important to let the painting dry at least 24 hours. Then an isolation coat should be added to prevent the varnish from sticking permanently to the paint. Wait another 24 hours, then add the varnish of your choice, being careful not to use too much.

Costs and Materials

Acrylic Paint is the least expensive of these options and is pretty easy to get ahold of. Of course, most acrylic paint that you will find in general stores is pretty cheap and of low quality. You can find higher quality acrylic paint online and at specialty art stores. Even still, it is relatively inexpensive and easy to get.

Notably, acrylic paint is best used with a plastic or glass palette. Wood palettes have too much absorbency, and most acrylic painters who have tried them end up frustrated. This is usually pretty cost-effective. You don’t tend to need a huge palette when starting out. It is best to use small amounts of paint to help conserve your supply and prevent it from drying.

The best brushes for acrylic paint have a spring to them and are able to hold up to repeated use. This is why most acrylic painters use synthetic brushes, which also cost less and are easier to clean. Having a variety of sizes and shapes can be helpful. As a beginner, it’s best to keep things simple going in, though, and just make sure you have a couple of flats, filberts, and rounds, in a few sizes.

Synopsis

Painting for Beginners: Acrylic paint is the best those who want to work directly, with opaque layers and less blending.

Synthetic Brushes from Dick Blick

Professional Acrylic Paint from Dick Blick

Watercolor Painting for Beginners

A hugely popular medium, watercolor does many unique things that are more difficult to achieve with oil or acrylic. It is versatile to work with and can be used in many styles. Simplicity of function works together with depth of complexity to make a really interesting painting medium.

watercolor painting by winslow homer

On the Trail, Winslow Homer, ca 1892, watercolor

Ease of Use

Watercolor paint is a relatively simple medium. By wetting the paint, an artist can easily start to experiment with its potential. Using either paint pots or tubes, the artist thins the paint to a desired consistency. The paint applies to paper, which thirstily takes in the pigments. It is better to work light to dark with watercolor, though there are many methods and successful approaches.

In fact, it is this versatility that might be the biggest selling point for watercolor. There is a huge space for experimentation and use of a wide variety of tools and techniques. Watercolor also boasts a large selection of different implementations, such as watercolor pencils and sticks. Some artists also complement their watercolor paintings with ink or gouache.

All a watercolor artist needs to start is some paint, some watercolor paper, and water in at least one jar. The water thins the paint, making it easy to manipulate and achieve desired results. It can be challenging to regulate the use of water and to control blending of pigments. With practice, this becomes second nature.

Resulting Artwork

Much like the medium itself, the resulting works show a wide variety of results. Watercolor is often very easy to recognize, though the styles and arrays of work can have vast differences. Because watercolor applies on paper, the end painting is often matte in finish. This is nice because glare on artwork is distracting.

There is a sense in which watercolor art is “soft” probably because it has a lot of natural gradations. The water disperses the pigments around the paper, creating areas of differing values. There are ways in which an artist may achieve higher levels of contrast and crisper effects. However, watercolor generally has a soft glow to it.

The best paints do result in wider ranges of vibrancy, so that the painting doesn’t lose its color to the effect of the water. This is a good thing because, contrary to oil and acrylic, layers of watercolor are thin. The pigments do not build up in the same way. Thoughtful artists achieve mixtures of colors through this application of thinly layered pigment.

Watercolor artwork often looks humble beside its oil and acrylic siblings. This is part of its charm, though, and is a primary reason why artists love it. It is less forgiving than its counterparts, requiring artists to be aware of what they are doing and to treat the medium differently. There is often an almost “sketchy” and lively look to watercolor art that is difficult to replicate with the other mediums.

Costs and Materials

As always, the best materials are going to be the most expensive and give you your best experience with the medium. The pigment won’t fade in the sun as quickly and the spread throughout the paper will feel smoother and satisfying. So, the overall cost may vary based on what you are hoping to achieve. Costs are comparable to oil paint, though watercolor medium tends to be used at a slower rate.

Instead of canvas, you’ll be looking for watercolor paper to work with. There is cold-pressed and hot-pressed paper. Cold press is more textured, whereas hot press is smoother. You will want to tape down the paper or use a watercolor pad with paper that is already taped around its edges. These pads of pre-bound paper are on the expensive side, though they are nice to work with.

As usual, you will find general-grade, student grade, and professional grade materials. The big differences here are affordability and quality. If you are just beginning, you might want to skip the general-grade stuff and go to student grade. It will make your experience more enjoyable.

Also remember that watercolor brushes are nice and soft, ready to soak up water and paint. They are not good for other mediums, besides gouache or other “watercolor adjacent” mediums. The cheapest versions usually wash away the hairs which can be very frustrating. So be sure to consider investing in some better materials if you want to give the medium a fair shake.

Synopsis

Painting for Beginners: Watercolor is the best those who want to experiment and work quickly with less fuss.

Professional Watercolor Paints from Dick Blick

Watercolor Brushes from Dick Blick

Verdict: Best Medium, Painting for Beginners

Not So Fast

It’s not exactly a science, is it?

Any beginner artist has a choice in front of them and there isn’t a wrong path to take. There might not be a best painting medium for beginners. You should consider a few things before jumping in.

  • Which medium has art that appeals to you
  • Which medium do you have space for
  • Which medium appeals to your sensibilities

If you stick to these criteria, you will undoubtedly make a great choice. And remember, you can always experiment with any of them! Though I mostly paint with oil, I am very excited to get more experience with watercolor. I’m getting to a point where I want to work more quickly and take on a different challenge with different complexities.

So, at the very least you have some examples and knowledge that can help you make an informed decision. I hope this article was helpful to you.

Need More Help?

Speaking of painting for beginners, I am always open to taking on private lesson students. I offer one free half-hour to get an idea of what your goals are and how we can get you to them. Then I design a specific lesson plan for you and we go from there. You can hire me for your personal lessons here at SuperProf or here at LessonFace.

Posted on

Charcoal or Pencil: What’s the Better Drawing Tool?

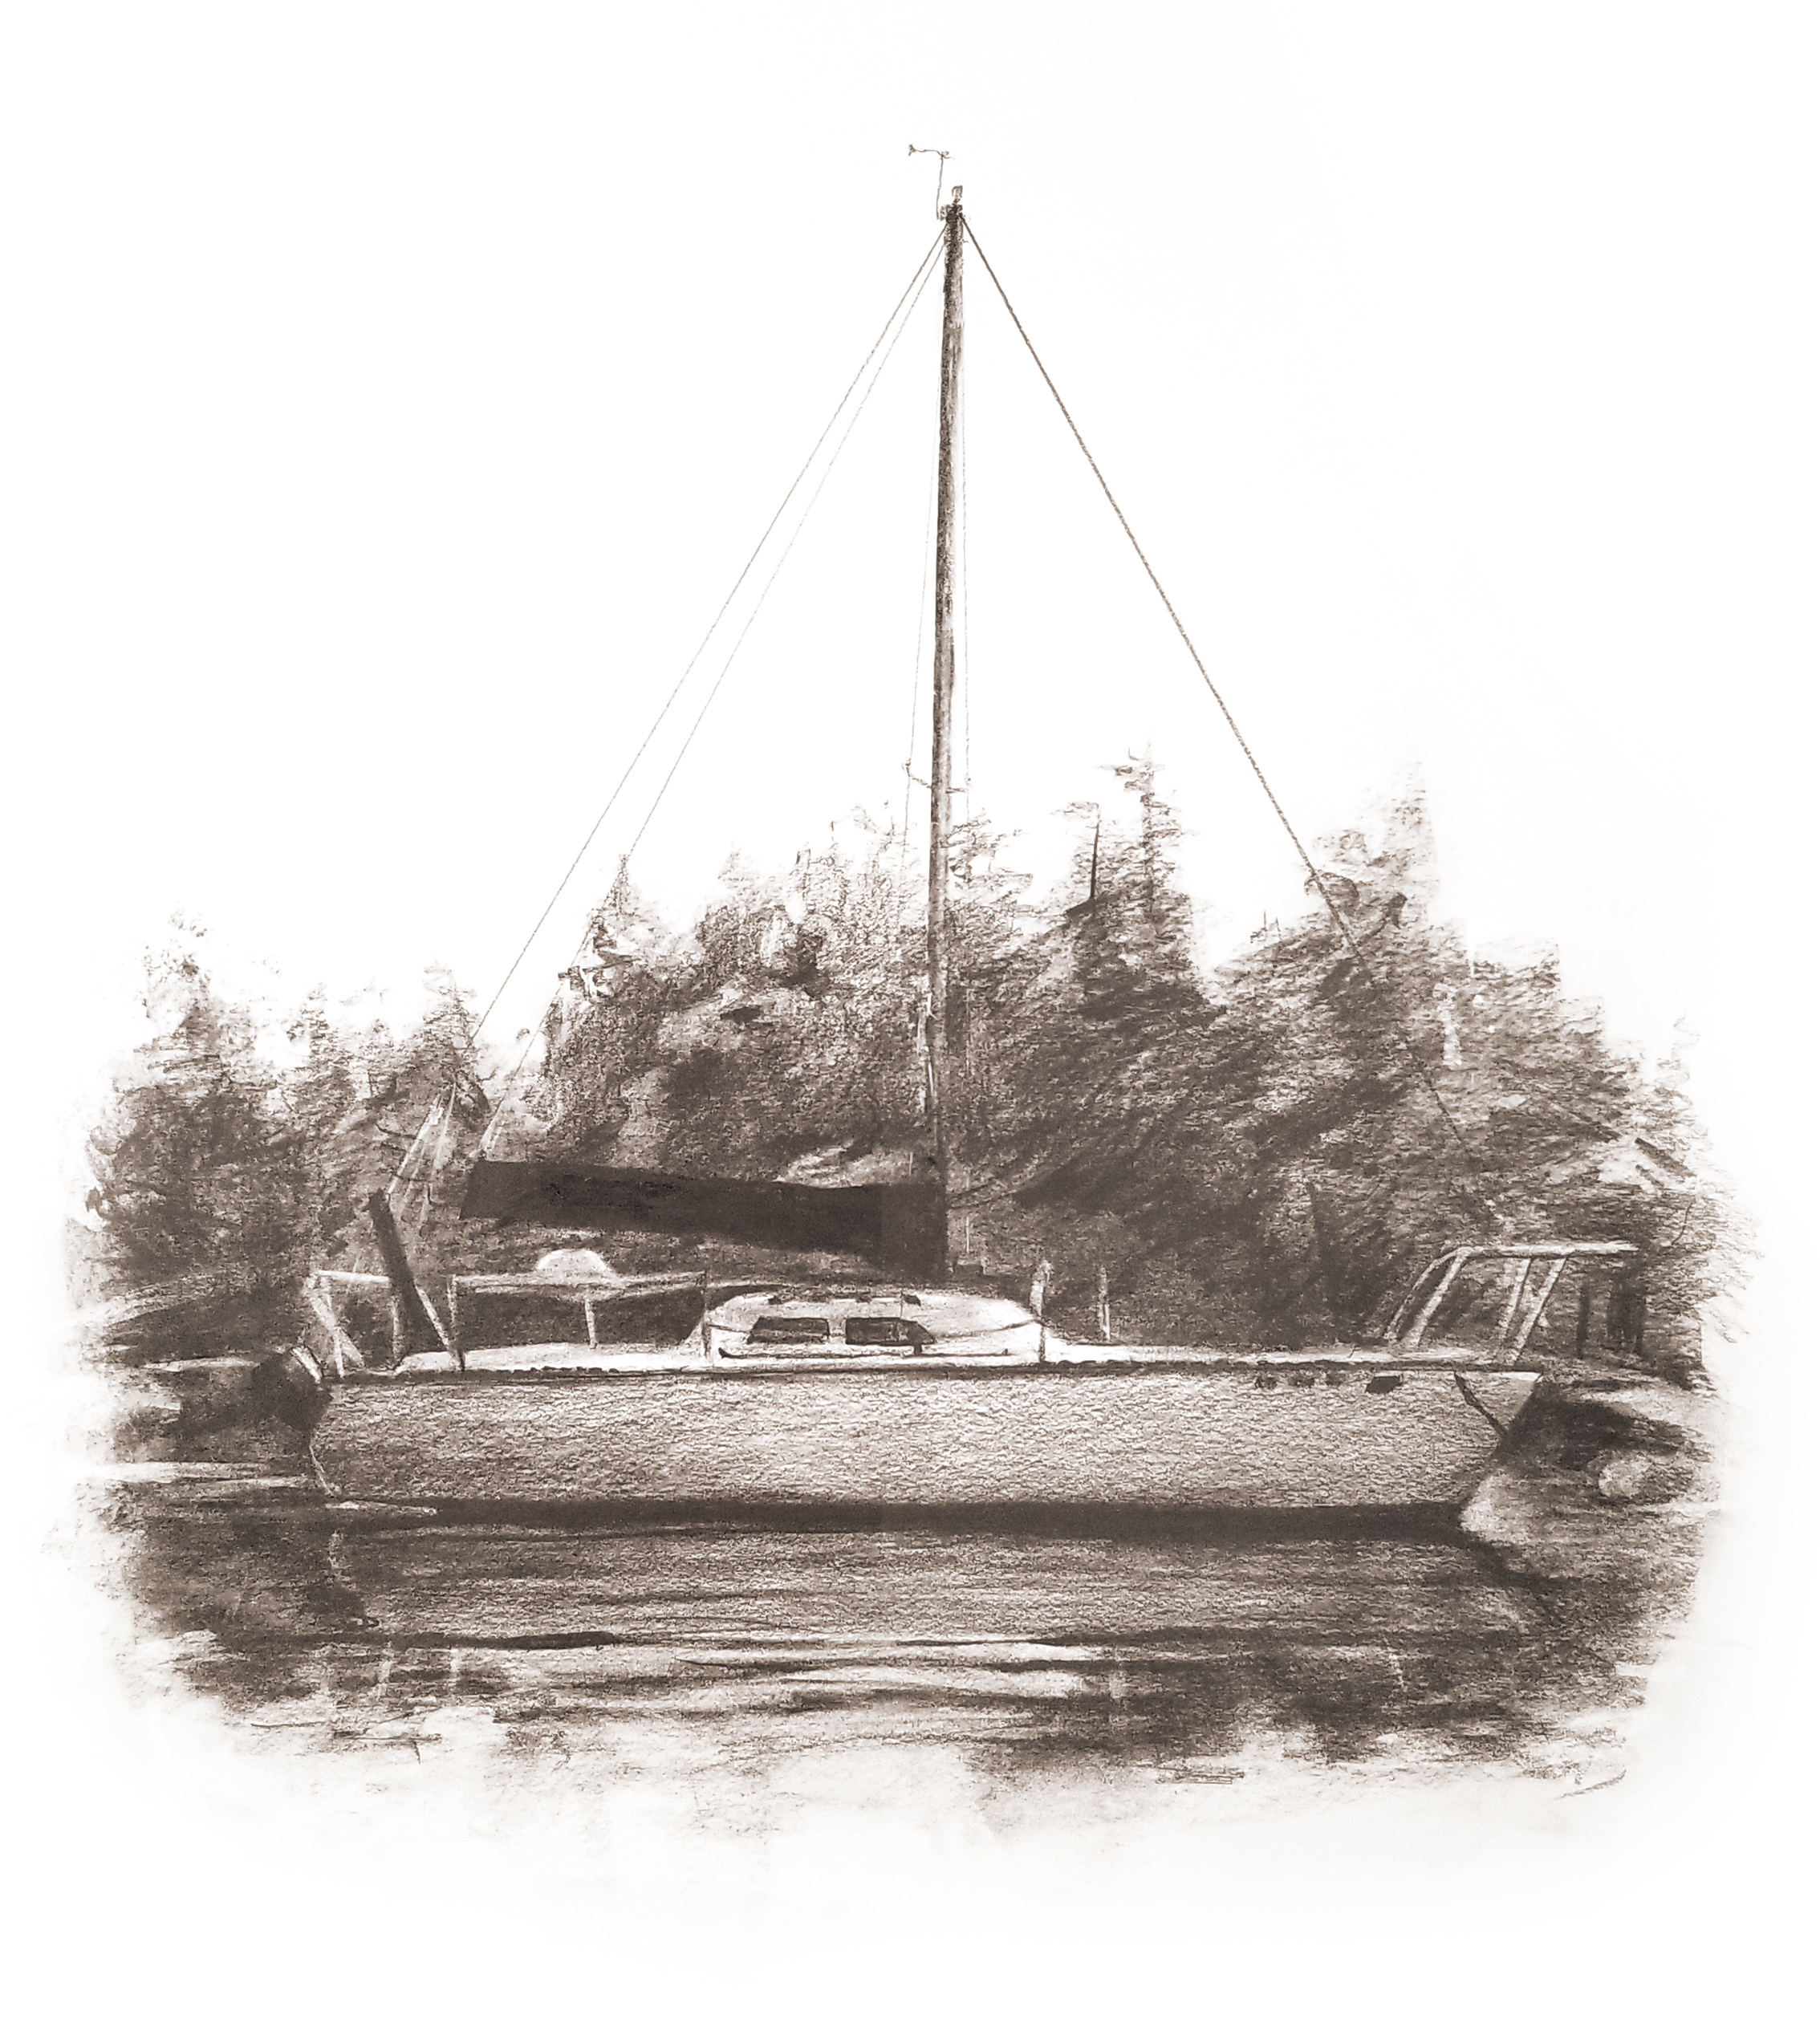
Orcas Island Sailboat Art Print Drawing

Which Medium is Better for Beginners?

Maybe charcoal vs pencil is a debate that seems silly and not worth having. However, I can look back at my past and see ways in which charcoal might have been a better solution to learning how to draw. I grew up on the pencil. We all have pencil experience. But maybe if you haven’t tried charcoal, you should reconsider.

Pencils: The Trusty Sidekick

As a child in the 80’s and 90’s, there were a small handful of ways we could draw and create. Crayons were a big deal at the time. Markers (especially those smelly ones) were pretty cool, too. I suppose we all might have done some finger painting at some point. But it was the pencil (graphite or colored) that stuck with us through the years.

We weren’t learning cursive with crayons, nor were we writing our first essays with markers. No Senior papers were being turned in with finger paint covering them. It was pencil (or sometimes pen) that was our required implement. It makes sense, because pencils are easy to write with. They have a nice point to them that is very handy for clearly writing the small shapes that make up letters and numbers. They are a detail-oriented tool.

How many classes did you attend where you realized you didn’t have a pencil and had to ask a neighbor or, ashamedly, a teacher if you could borrow one? How many tests did you take that required a number 2 pencil? We used pencils so often that I developed a favorite brand and model. The Ticonderoga number 2 pencil was where it was at! Other pencils were poseurs and amateurs with waxy tips that couldn’t replicate the chilly sharpness of the Ticonderoga.

Pencils: The Measure of an Artist?

This attachment to the pencil (and the readiness at which they were available) forced us to also draw with them. Sure, crayons and markers and paint were utilized in the arts and crafts modules, but those could be few and far between. An occasional treat. Think back to high school. When you think of the artsy kids who were creative, how often did you see them associated with their pencil and pen skills? It seems like at least half of the art projects in school revolved around pencils and pens.

Drawing games also revolve around pencils and pens. Pictionary comes loaded with pencils. Telestrations has dry erase markers, which are no less restrictive. Pencils and pens are cheap, clean, and easy to package. They are incredibly versatile, too.

I got really good with a pencil. I stuck with it. Where other kids were not as dexterous with their pencils, I was trying things, experimenting, finding the best ways to progress with them. Hatching, shading, blending, and on and on. For whatever reason (lack of interest, early disappointment, frustration with the tool, some other combination of events), other kids just weren’t really adapting to the pencil as well.

Is There a Better Alternative?

Now, I do believe in some amount of natural abilities, whether by nature or nurture or both. However, I remember my first time using charcoal. It was incredibly difficult for me. I had to completely change the way I thought about drawing. It wasn’t in the dexterity of my fingers anymore, but in the control of my whole arm; not just small details anymore, but large shapes. It wasn’t building from the inside out, but from the outside in.

And that’s exactly how beginners (young and old) should be thinking about drawing. I was oddly blessed to be as apt with a pencil as I was, working through the stages of drawing development quickly with a pencil. Others would be so much more served with charcoal being their first real drawing implement. I would pit it against pencil any day.

Pencil is a great tool. I still draw with pencil and I doubt I will ever stop. But it is NOT the best tool for learning how to draw. That award goes to charcoal. Charcoal is without a doubt, the best medium for beginner drawing. Couple charcoal with good-natured playfulness in art, exploration, a good amount of knowledge and practice, and you’ll find a student that will grow by leaps and bounds in every facet of drawing, including observation, problem solving, and stress relief. So, in a competition between charcoal vs pencil, I come down on the side of charcoal, for beginners.

Nevertheless, I think any implement is better than nothing! And pencils are fantastic in their own right. You’ve got to choose the medium you most want to use.

I truly believe that anybody with an interest can enjoy and excel at drawing. Remove every false and limiting belief, because we’re all on equal ground. You’re not too young or old, too slow, too poor, too busy, or too late to become good at drawing. It isn’t an impossibility, but is actually quite possible.

Why You Might Want to Start Drawing

And here’s what drawing does for you:

  • Communicate visually
  • Increase memory
  • Raise observational skills
  • Boost learning ability
  • Spark your imagination
  • Help you unwind and relieve stress
  • Create avenues for exploration
  • Improve problem solving
  • Lower anxiety
  • Increase emotional intelligence
  • Open you up to other pursuits
  • Grant the ability to create beautiful drawings for loved ones

I will be continuing to communicate my thoughts on drawing over the next few weeks.

Drawing Pencils Available at Dick Blick

Charcoal Supplies at Dick Blick

Are You Interested in Painting? Read this Article on Painting for Beginners

Need More Help?

Speaking of painting for beginners, I am always open to taking on private lesson students. I offer one free half-hour to get an idea of what your goals are and how we can get you to them. Then I design a specific lesson plan for you and we go from there. You can hire me for your personal lessons here at SuperProf or here at LessonFace.

Posted on

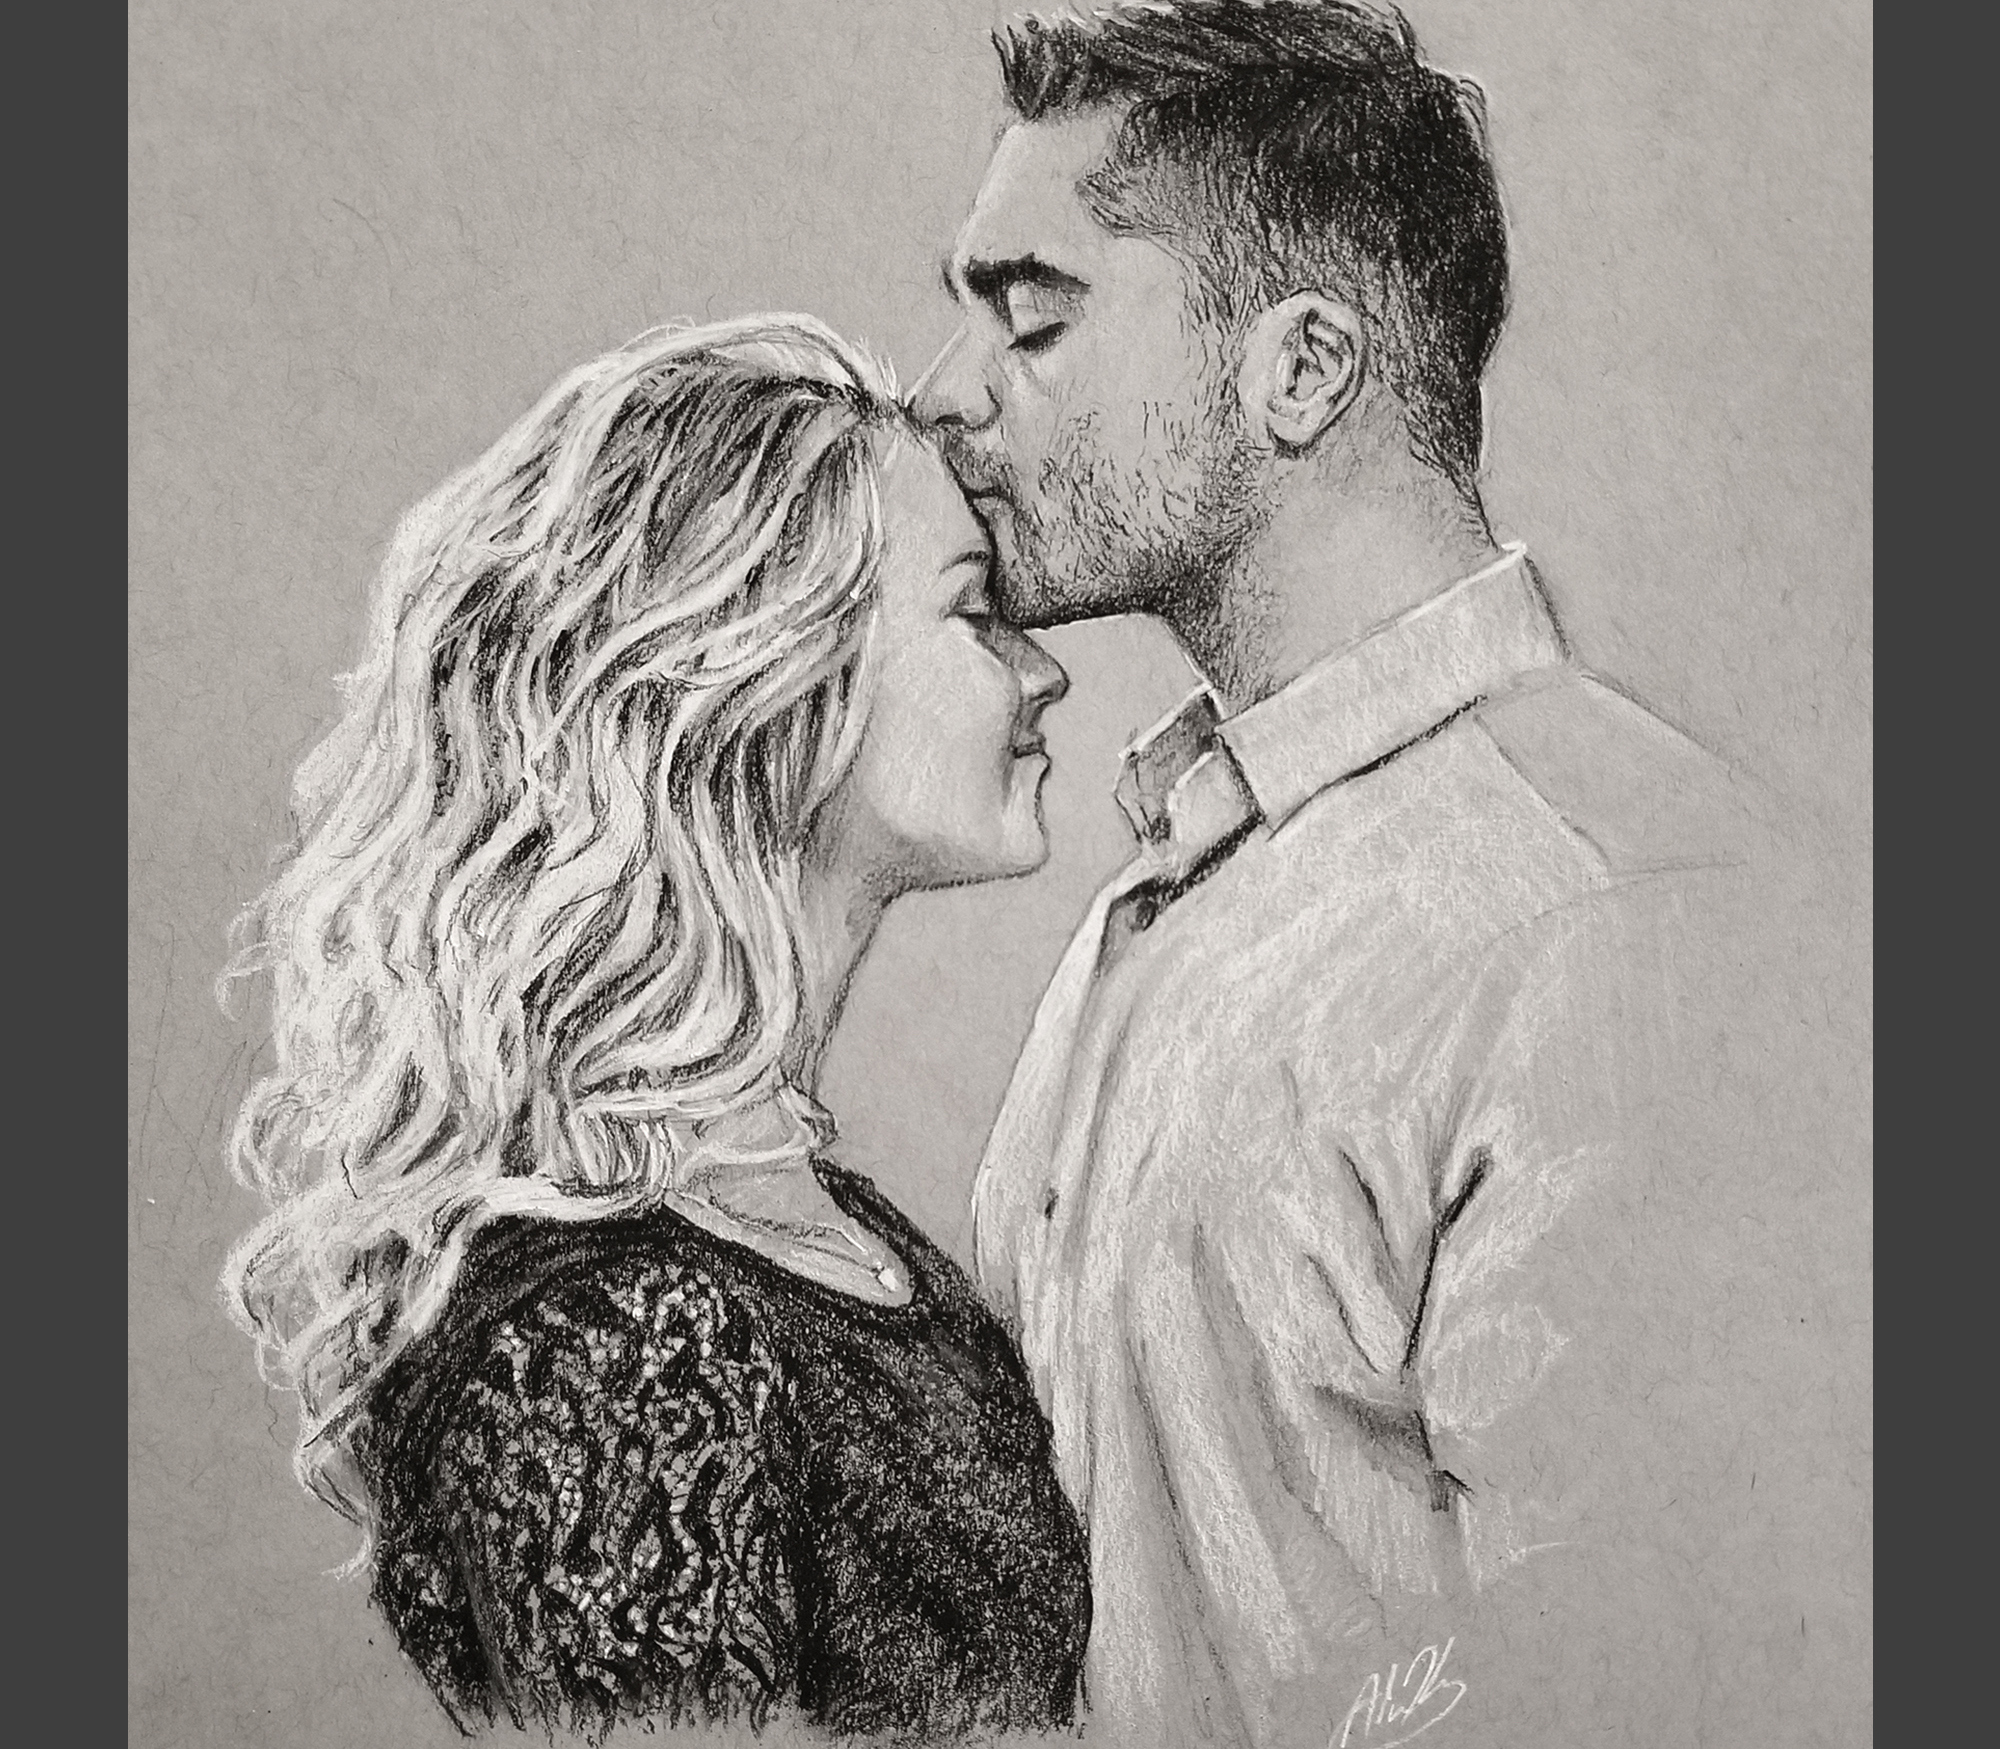
Custom Hand Drawn Portraits

Just recently, I decided to open up an Etsy shop specifically for custom portraits.

A portrait is something that can last a lifetime and take on sentimental value over time, as it is passed between generations. It is also a great way to commemorate someone special or link people that never had the opportunity to be linked in life.

It’s why I find value in drawing portraits for people. I think it’s an honor to be given an opportunity to serve someone through my skills and offer them something of immense significance and value.

My Etsy shop is brand new, so there are no reviews for it yet. But never fear! It can be found here: Custom Hand Drawn Portrait Charcoal and Pencil Drawings – Etsy

Thanks!

Posted on

ETSY!!!

Why and What and How and Huh?

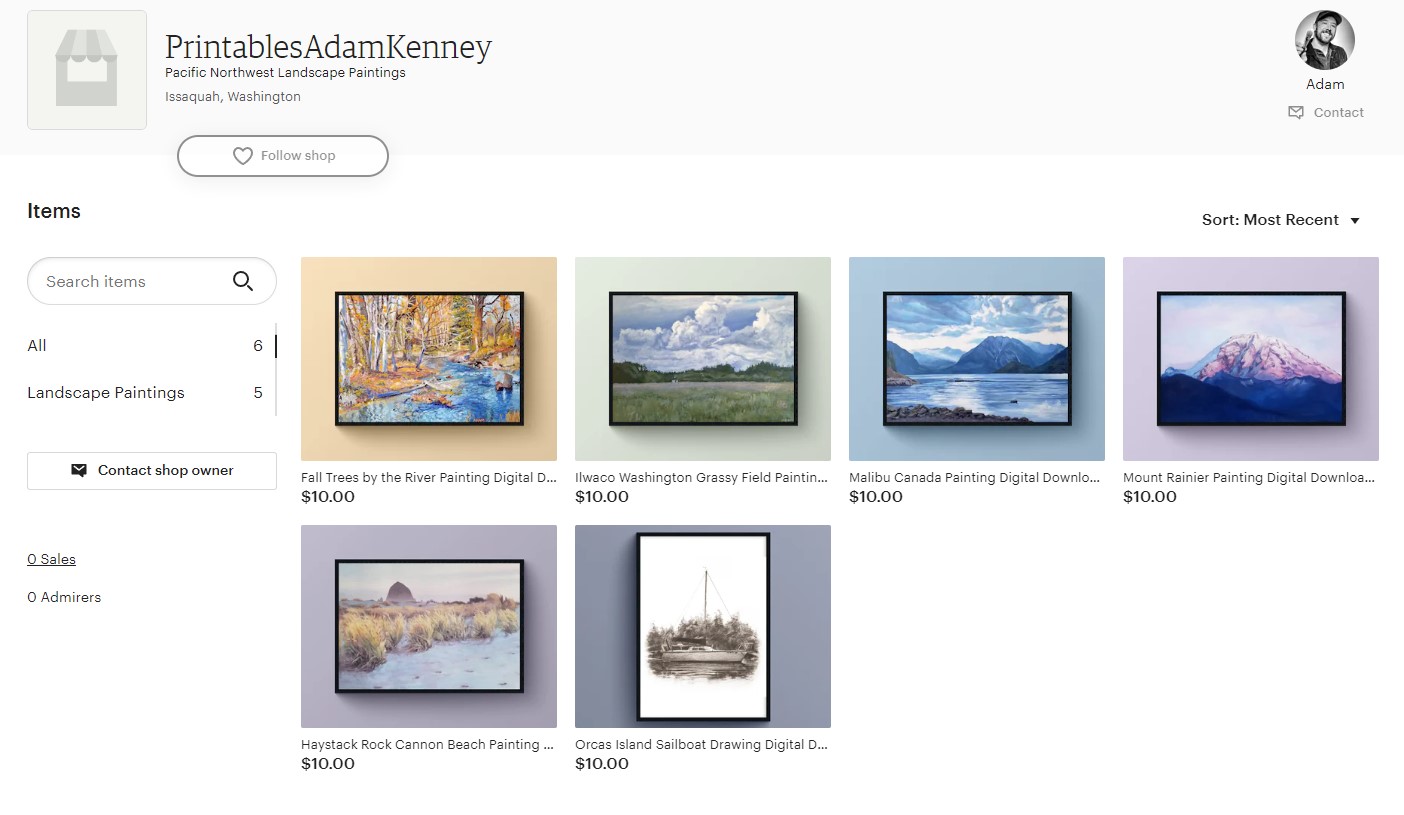
I recently decided to open an Etsy shop of printable downloads. You can go see it here.

Why?

Many reasons!

  • It opens up my art to be seen by more people around the world.
  • It is an easy experience for listing new products.
  • It keeps me invested in creating new work and promoting only the best art I can make.
  • It offers customers access to high quality files of my art, so that they can make whatever print they would like

What?

An Etsy shop is a place people can go to purchase work from small business artists. This is a place that isn’t like going to Walmart for your decor, but is a way to support artisans like me! Think of it like a street fair online that you can peruse any sort of wares you want.

My Etsy shop consists of downloadable art that can be printed by customers. Because the files are digital, they can also be set as wallpapers for devices and computers. They can also be put on digital frames, just like you would with family photos.

How?

First, I create a set of five high-quality images based on a specific work of art I’ve created. These images are sized to fit most standard ratios. They are also all set to 300 ppi (pixels per inch), which guarantees high quality printing, and are edited to the highest sharpness and clarity I can manage.

The customer chooses an artwork they like, the proceed to make their purchase. They receive a text file that comes with the purchase, then follow the link in the text file to a page that allows for the downloading of the art files.

Each art file is pretty huge, so they can be safely downsized to smaller frames, if needed. Making them larger than the file size specifies will unfortunately lower the overall quality and resolution of the final print. So, I advise against doing that.

Huh?

That’s it!

You should go check out Etsy, especially if there is some sort of special thing you might be looking for that will supplement a need for you house or hobbies. You may find exactly the thing you are looking for!

Posted on

Orcas Island Sailboat #1, Charcoal and Pencil on Paper, 2023

Orcas Island Sailboat Art Print Drawing

Capturing Memories

It’s not often that I break out the pencil or charcoal and start to draw, but yesterday I was feeling inspired. The day before, I had set aside my paintbrushes to dry after cleaning them, knowing that I wouldn’t be able to use them anytime soon. I was feeling creative, though, so I thought, “Well! You haven’t drawn in a while.”

And that’s true! The most recent drawing I had done was some sort of a speedy drawing for Instagram. I hadn’t sat down for a good set period of time, with the intention of drawing with accuracy and artistry.

So, that day I decided to draw this sailboat that I took a picture of on my honeymoon. There are such great and fond memories I have of the time together on Orcas Island. The desire to record that memory through art really appeals to me. I went to work and soon found myself frustrated. I was rusty! The materials didn’t feel right in my hands and I had this haphazard approach to the project. It ended in shambles.

But there was still this little part of me that enjoyed getting back into using charcoal.

Yesterday, I decided to approach it again. This time, I had a plan. I was going to start with charcoal, but then dive into pencil, while also utilizing a soft brush to spread the charcoal around a bit more easily. I was already somewhat familiar with the subject, but this time I really focused in on making sure things looked right. For the ropes and lines, I used a ruler to ensure accuracy (my heart argued with my brain and was like, “That’s cheating!”)

So here it is! I’m really happy with it and hoping to ride the emotional momentum into some more inspired drawings. It’s just nice to change the pace a little bit. I’ve been so into oils lately that I want to mix it up.

If you like this drawing, you can have it!

As an art print! – Orcas Island Sailboat Art Print – Adam Kenney Art

  • Printed and shipped (for free) in sizes 8×10, 8.5×11, 11×14, or 13×19 (signed and numbered)
  • or as a Downloadable File – in all kinds of sizes (just select downloadable from the dropdown menu)

Or even as a greeting card! – Orcas Island Sailboat Greeting Cards – Adam Kenney Art

Posted on

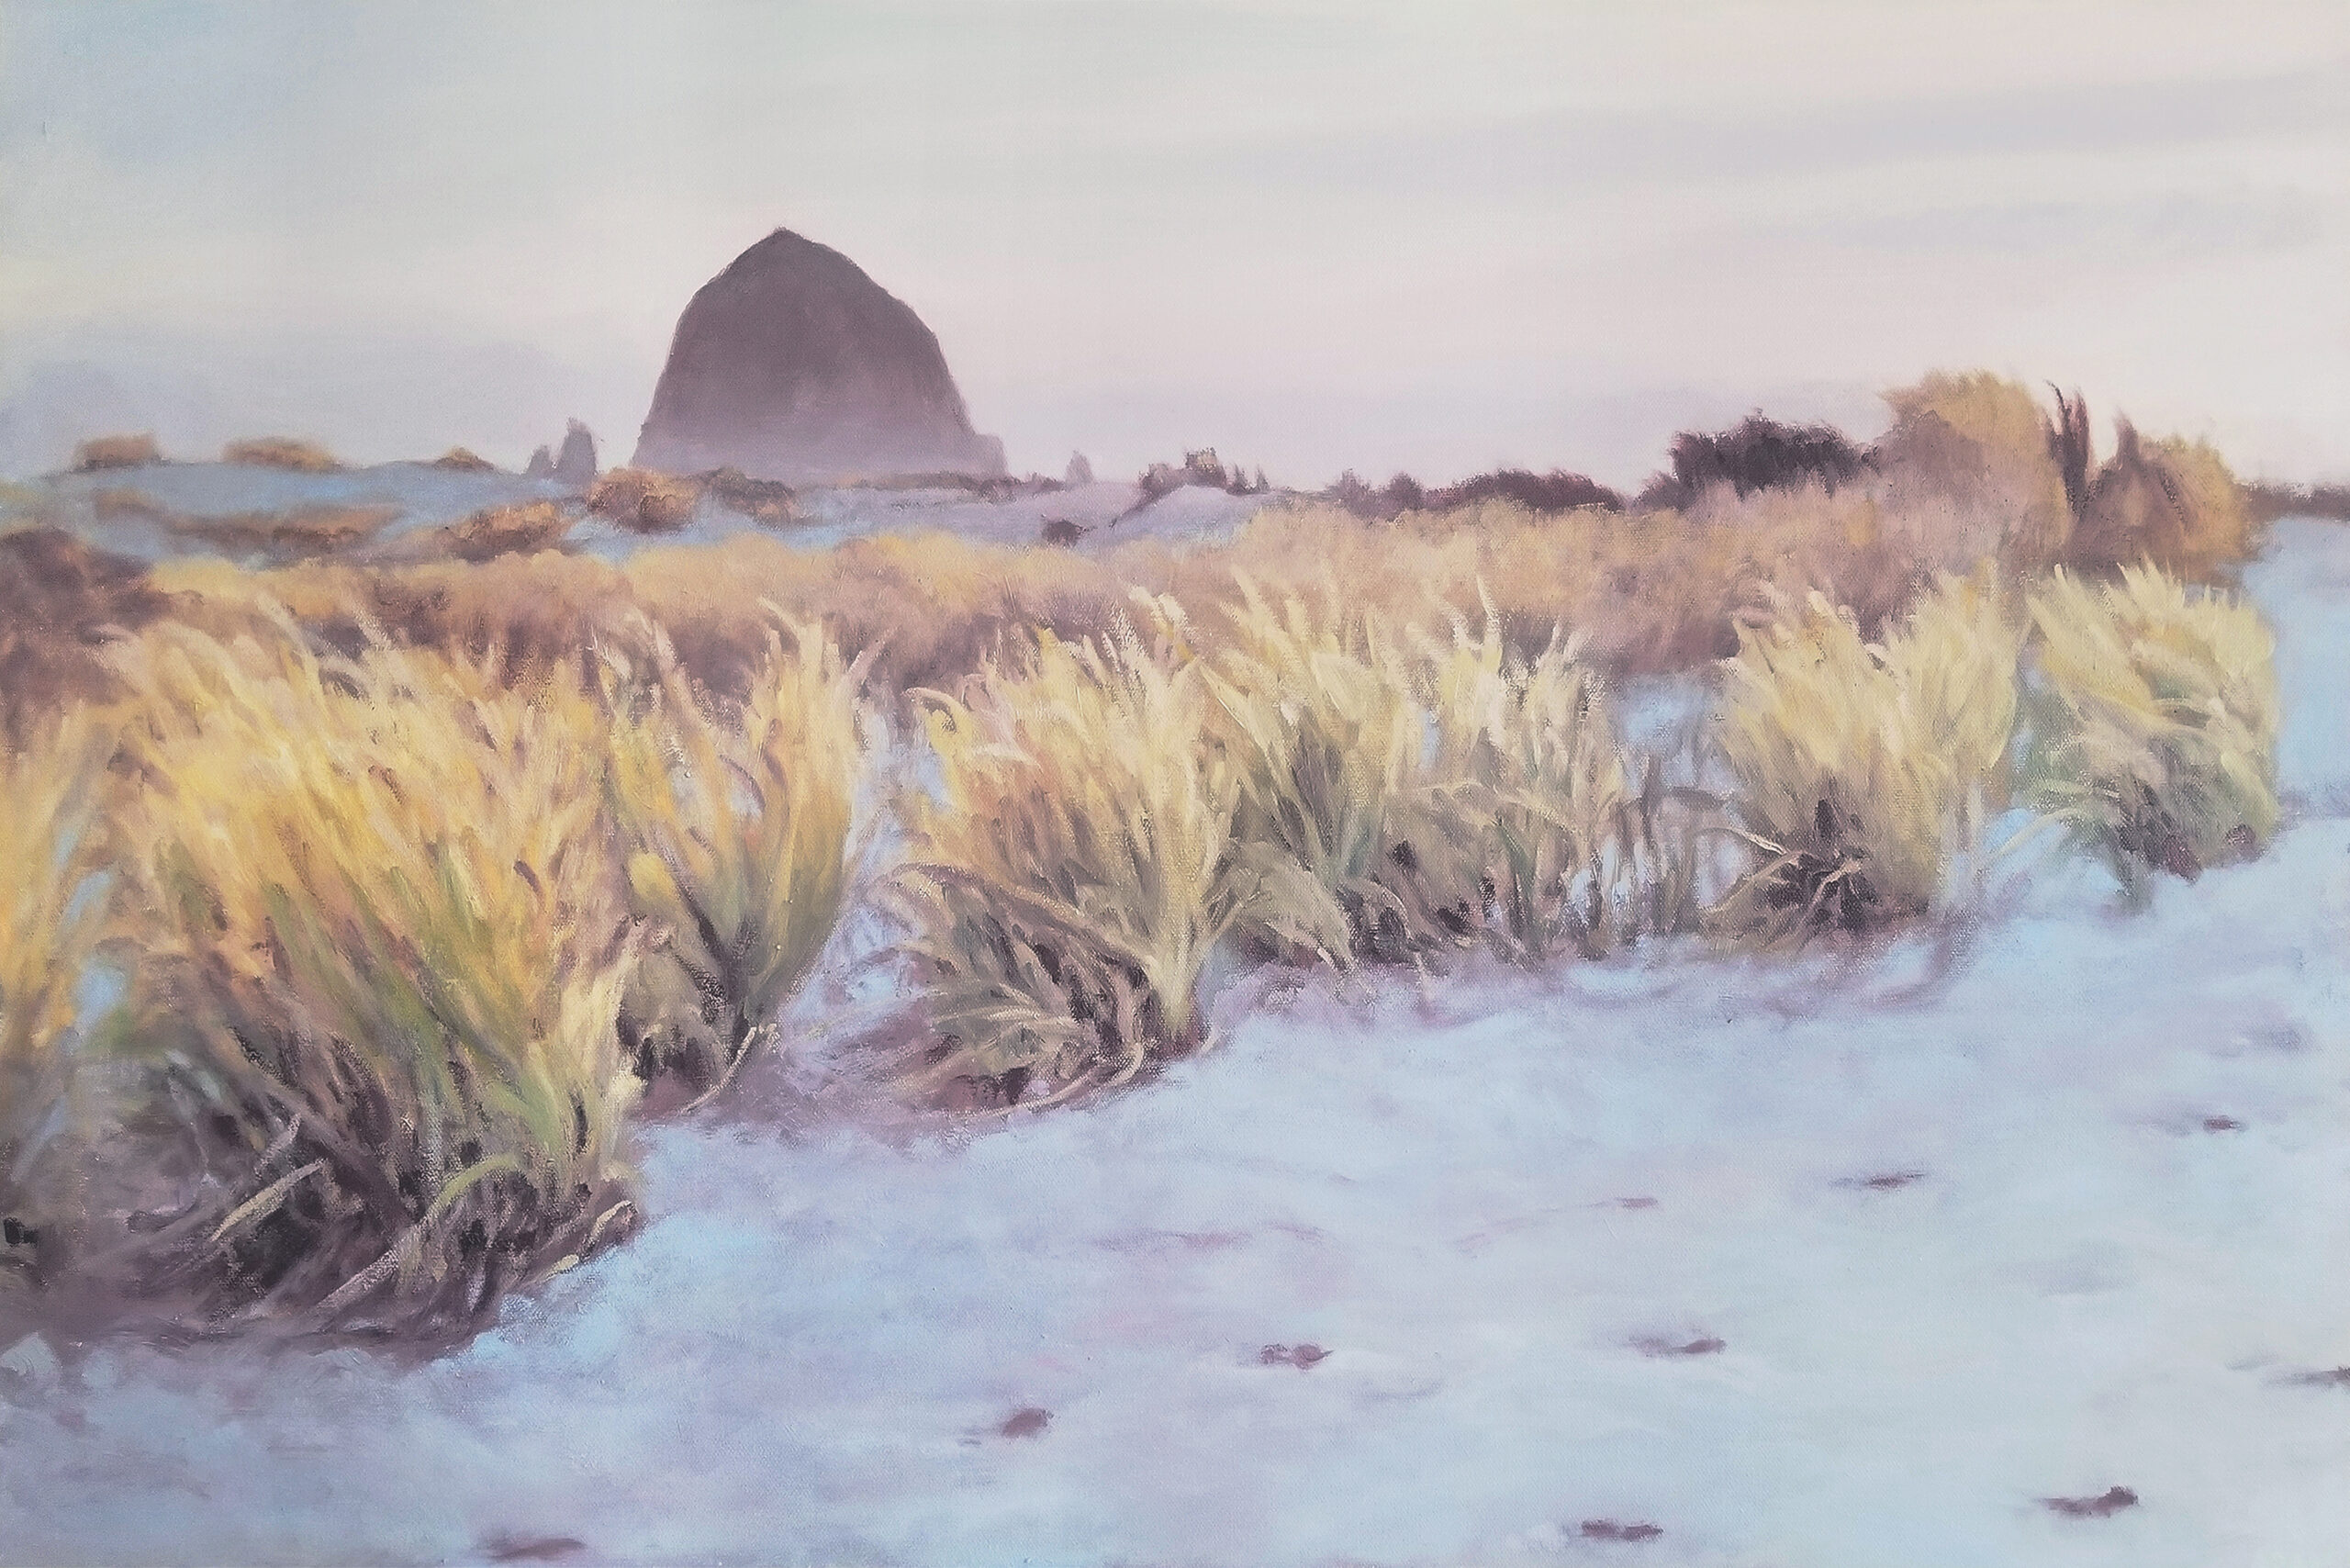
Haystack Rock, oil on canvas, 2019

haystack rock

What is Haystack Rock?

Haystack Rock is a geological formation off the coast of Oregon state, near Cannon Beach. Tourists flock to visit the sea stack because of its size and how close it is to the shoreline. It’s humongous! When the tide goes out, you can walk much closer and even see starfish and other sea life on and around it. It’s just another example of the beauty of the Pacific Coast.

How I Chose My Composition

My wife, Amber, and I went to visit Haystack Rock a few years ago, which is when I snapped the pictures that would serve as my reference for this painting. The weather was clear with some high-altitude clouds masking the sun slightly, resulting in beautiful colors and lighting. I took as many pictures as possible from all sorts of different angles, hoping that at least one of them would strike me as inspired when I went back through them.

One idea was to do a painting where Haystack Rock was the primary emphasis, large and in charge, looming straight down the center of the canvas. While I didn’t go in that direction, I am still intrigued by the idea and it might see the light of day, eventually. However, it just wasn’t exactly calling to me as much as a different composition – one that felt pretty unusual.

The composition that appealed to me was one that emphasized the beach, with the rock formations sitting in the distance. First of all, I think the landscape surrounding the ocean is just as beautiful as the water itself and is often far more interesting to look at. Secondly, I thought it might lend a bit more mystery to the rocks if I placed them in the distance, a bit vaguer and more removed, but present. It gives the rocks the personality that I wanted to infuse them with.

Painting the Scene

I am about the most boring color-chooser in the world. For years, I have picked the same colors over and over again for my paintings. I think you can easily see it when you look at my paintings. Until more recently I have not been the most courageous or knowledgeable color-guy. It’s only now that I’ve been studying color and light so much more, resulting in bolder choices with my paints.

This painting was a bit different for me because I built the whole thing around one color and it’s a color that comes straight from the tube. It’s one of those oddball colors that I typically don’t go for, because I have some weird thing about being traditional with my materials. I used a color called Radiant Blue from Gamblin. I thought it was some unusual pigment that was specific in some way, but recently I found out that it is essentially a combination of Titanium White and Ultramarine Blue pigments. So, now I feel less adventurous.

In any case, by emphasizing Radiant Blue, I was able to build the entire painting around it and keep myself from using too much white everywhere (something I’m prone to do). It essentially became my highlight. The sky, of course, is lighter, but that’s how I wanted it – the land a certain range of values and the sky its own.

As usual, I roughed in the major shapes of color and built up the paint over time. It helps me get a grip on my composition and have a handle on the components that build it up and make it what it is.

haystack rock

Legacy

I hope you enjoy the Haystack Rock painting. It has become one of my more popular paintings. My mother-in-law really loves it and purchased it from me. While it is currently on display in a showing in Seattle, it usually hangs in her living area in her home, where it can remind her of the beach.

If you are interested in picking up your own high-quality print of the painting, you can find it here – Haystack Rock Art Print – Adam Kenney Art.

Thank you for reading!

Posted on

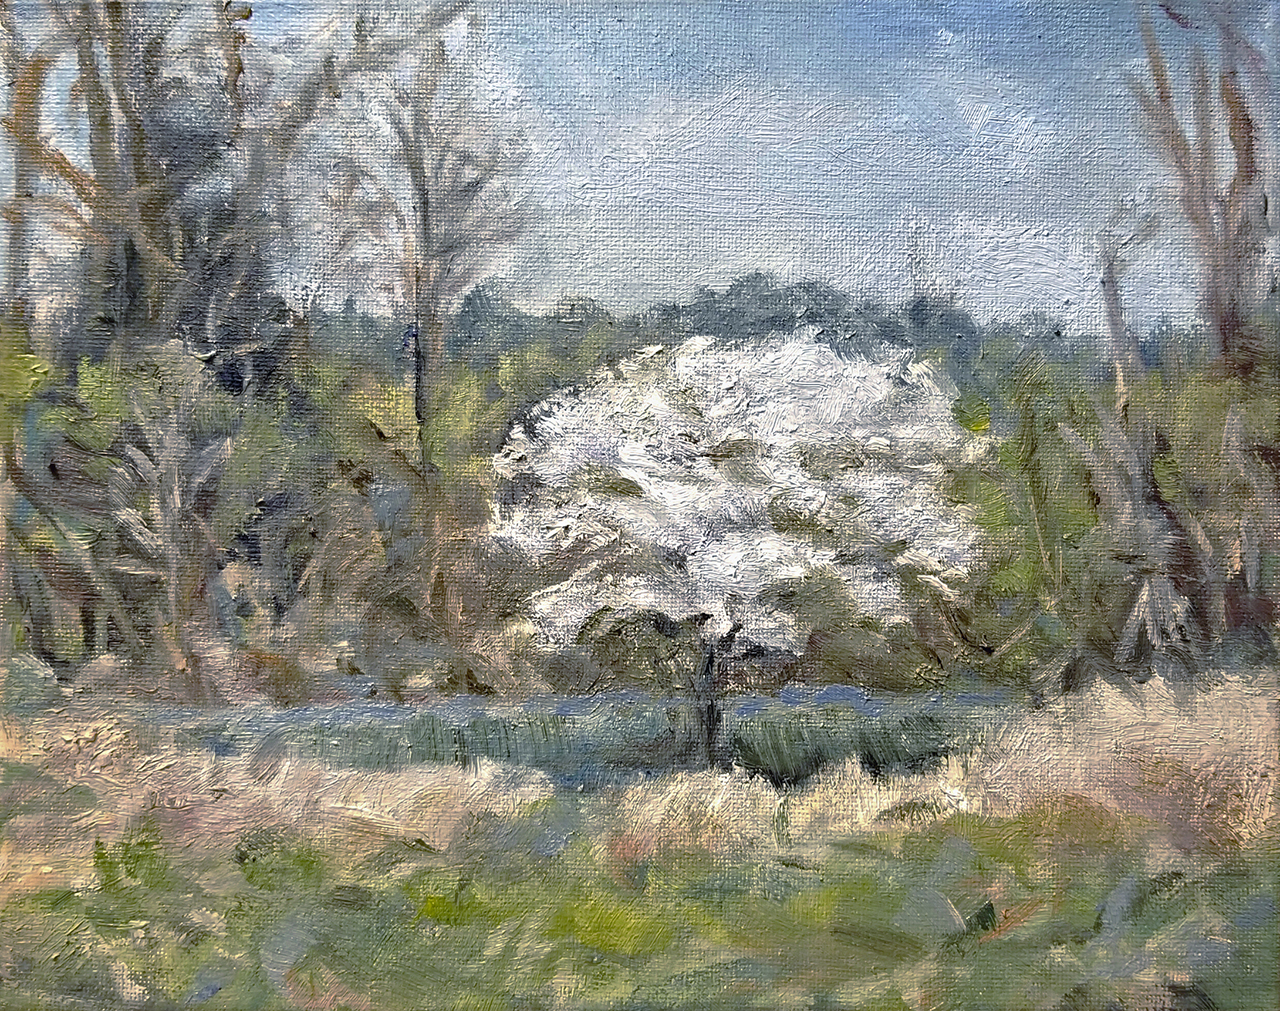
Spring Bloom, oil on canvas, 8×10

spring bloom

Surprised by Nature

In the middle of a small glade, I saw this white blooming tree that stuck out like a sore thumb (but in a good way!). I decided I wanted to do a simple sketchy painting of it, hopefully capturing its prominence against the vibrant greens and ruddy browns of early Spring, before most trees have really started blooming. A painting like this is a nice reminder of the simplicity of painting and the small joys of being surprised by nature.

Several sizes of print are available for this painting, here: Spring Bloom – Adam Kenney Art

Posted on

Five Principles to Level Up Your Painting Skills

multicolored abstract painting

I wanted to take a slightly different approach to today’s blog and upload a video, instead. I’ll probably be doing some of these from time to time. It’s just a different way of communicating that is sometimes more direct and easier for me to make. Writing can be really hard! Rambling, however – easy.

I hope you enjoy the video.

But, wait! There’s more!

I do keep a regular blog here, so please visit often. I also release a newsletter that can keep you up to date on all of the latest from my website. Thanks!

Posted on

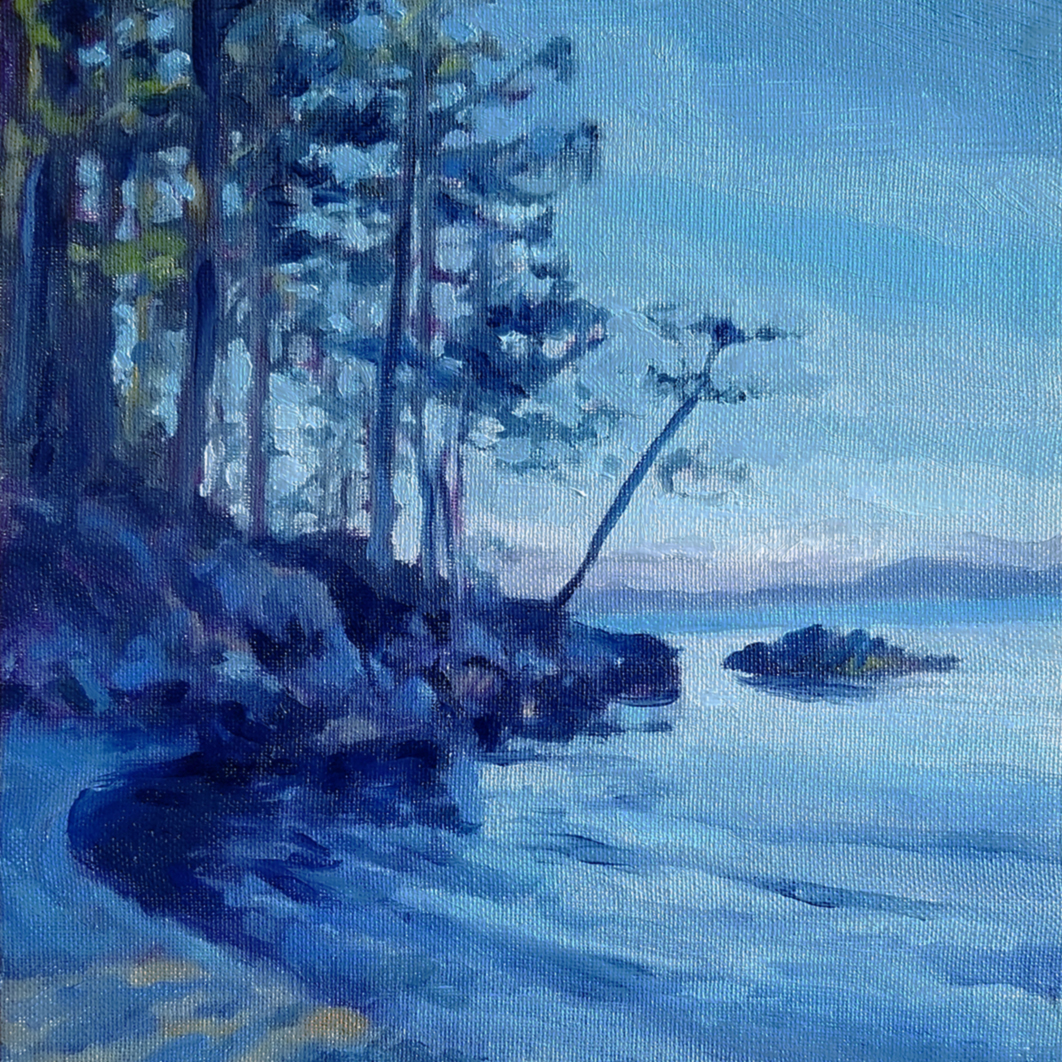
Anacortes Beach, 10×10, oil on canvas

anacortes beach art print painting

Paintings very rarely do justice to the subjects they represent, but they do serve as nice reminders that we can use to go back in our minds to a special time. My wife and I went to Anacortes last year for her birthday. We stayed in a small and relaxing Airbnb, ate at a fantastic Italian restaurant (complete with accordion player), and spent the morning searching the local park beach for shells and colorful rocks. This view was down at one end of the beach, prompting me to take a snap of it for an eventual painting. With a little bit of imagination, I can feel the breeze and smell the salt water, reliving the peaceful moment.

BTW, did you know that just being near water can have an impact on your health and peace of mind?

You can purchase a signed and numbered print of this beach scene here.